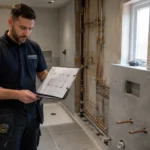
A Bathroom Fitting Snagging Checklist is essential after your bathroom fitter completes the installation work. The most crucial step is conducting a thorough snagging inspection. Snagging refers to identifying minor defects, incomplete work, or quality issues that need correction before you settle final payment and accept the completed bathroom. Many homeowners overlook this step, only to discover problems later that become expensive to fix. Following a Bathroom Fitting Snagging Checklist ensures your new bathroom meets the agreed standard and functions perfectly from day one.
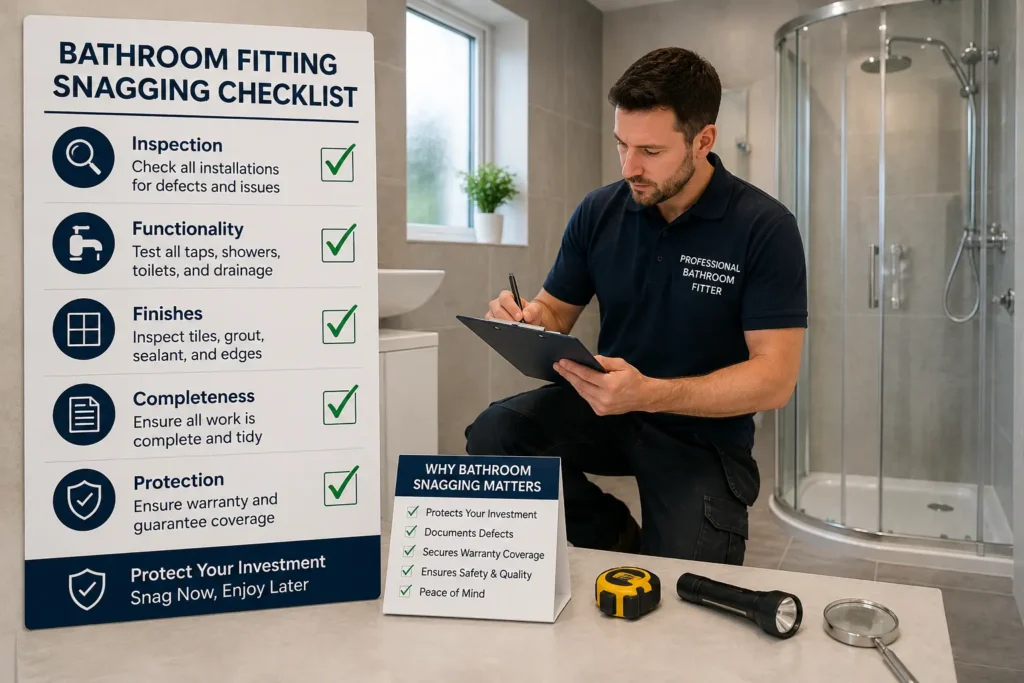
Why Bathroom Snagging Matters Before Final Handover
Snagging isn’t just about finding faults for the sake of it. This process serves several critical purposes. First, it protects your investment by ensuring all work meets your expectations and the contractor’s promises. Second, it documents defects while the bathroom fitter remains responsible for corrections under the contract terms. Third, it secures your warranty coverage, as most guarantees require issues to be reported within a specific timeframe. Finally, it gives you peace of mind that your bathroom functions properly and safely before you live with it daily.
Many bathroom fitters build snagging time into their project timeline, so scheduling this inspection after installation is complete but before final payment is standard practice. This proactive approach prevents disputes and ensures corrections happen while the team is still mobilized on your site.
Preparing for Your Snagging Inspection
Before you begin the checklist, ensure the bathroom is clean and tidy. A dirty or cluttered space makes it difficult to spot defects and assess finishes properly. Ask your bathroom fitter to ensure the space is cleared of dust sheets, protective coverings, and debris. Many minor marks and scratches become obvious once cleaning is complete.
Ideally, conduct your inspection during daylight hours when natural light reveals imperfections more clearly. Bring a flashlight even during the day, as you’ll need to inspect pipes beneath basins and around the toilet. Have your phone or camera ready to photograph any defects you find. Documentation helps your fitter understand exactly what needs attention and creates a record should disputes arise later.
Checking Your Toilet During Snagging
Your toilet requires thorough examination, as it’s one of the most used fixtures in your bathroom. Start by checking that the toilet is completely level and doesn’t rock when you apply gentle pressure. A wobbly toilet indicates poor installation that could damage the wax ring underneath and eventually cause leaks.
Flush the toilet several times and listen carefully to how it fills and empties. It should flush powerfully without hesitation and fill silently without prolonged noises. After flushing, the cistern should fill completely within about two minutes and then stop. If filling continues or the cistern doesn’t empty completely, these are defects requiring correction. Professional Bathroom Fitters in Wolverhampton will normally identify and resolve these issues during the final snagging inspection before handing over the completed bathroom.
Inspect the toilet seat and lid for damage, and ensure they fit snugly without gaps. Soft-close mechanisms, if included, should operate smoothly without grinding sounds. Check around the base of the toilet for water marks or dampness using your flashlight, as this indicates leaks around the connection. Press a dry cloth around the base to confirm the area is completely dry.
Inspecting Your Basin and Taps During Snagging
The basin should be securely fixed to the wall or vanity unit with no movement when you apply gentle pressure. Run both hot and cold taps and listen for any strange noises, like water hammer sounds or squeaking. Water should flow smoothly without sputtering or pressure inconsistency.
Check water temperature by holding your hand under the tap. Hot water should arrive within ten seconds of turning on the tap. Inspect underneath the sink with your flashlight for any drips or moisture around pipe connections. Also check the plug and waste drain. The plug should fit snugly and seal properly when closed. The waste should drain quickly without gurgling or backing up.
Examine the basin itself for cracks, chips, or scratches. Look along the base rim and underneath, as damage here can be easy to miss. Check that the taps are level and aligned properly. Inspect the silicone sealant around the basin where it meets the countertop or wall. Sealant should be smooth, continuous, and white or clear without gaps, cracks, or discoloration.
Evaluating Your Bath and Shower Installation
For baths, check that it’s level and doesn’t move or creak when filled with water. Run the bath and listen for any unusual sounds as water fills. Check that taps flow properly and water is the correct temperature. Inspect the waste plug and overflow, ensuring they function smoothly. Examine the panel beneath the bath for secure fitting and check that all gaps are sealed properly.
For shower enclosures, ensure the screen or door opens and closes smoothly. Check for any movement or flexing in the glass when you apply gentle pressure. Examine the silicone sealant around the enclosure, particularly along the bottom edge where water penetration is most likely. The sealant should be continuous without gaps. Apply water to test drainage at the base to confirm water flows away properly, especially on projects completed by mobility bathroom fitters.
Run the shower and verify water pressure is consistent and adequate. Check water temperature control and ensure the mixer responds smoothly. Listen for any unusual noises as water flows. Inspect the showerhead for proper alignment and water spray pattern. Some showering areas may feature tiling instead of enclosures, so check that grout is tight and sealant is continuous around the edges.
Bathroom Tiling and Grouting Snagging Points
Examine all tiles for visible damage, including cracks, chips, or scratches. Look at the grout lines between tiles and ensure they are consistent in width and color throughout. Grout should be smooth and continuous without gaps, cracks, or hollow areas. Run your fingernail along grout lines to check they’re hard and properly set.
Check that tiles are level and not sloped or warped. Sight lines along rows of tiles should be straight. At corners and edges, look for neat mitered or edge trims that are finished properly. Inspect where tiling meets other materials like plasterboard or fixtures to ensure transitions are neat and properly sealed.
Around wet areas like the bath and shower, inspect the sealant as mentioned previously. Silicone sealant around tiled areas prone to moisture should be flexible, glossy, and completely continuous. Discoloration or black spots in sealant indicate mold growth, suggesting poor installation or ventilation problems.
Checking Plumbing Connections and Water Pressure
Using your flashlight, carefully inspect all visible pipe connections under basins and toilets. Look for drips, damp patches, or crystalline deposits that indicate past or present leaks. Press the area with a dry cloth to confirm it’s completely dry. Check that pipes are secured to the wall or floor with clips at appropriate intervals, preventing them from moving or making noise.
Test water pressure at all fixtures simultaneously if possible. Turn on both the basin tap and the shower, or multiple taps if your bathroom has them. Water pressure should remain consistent without significant drops. If pressure is noticeably lower when multiple fixtures run simultaneously, discuss this with your fitter, as it may indicate undersized pipes or pressure problems.
Inspect the pipework for exposed cuts or ragged edges that could accumulate dirt or cause injury. Check that all plastic pipes have appropriate clips and support every 600 millimeters. Metal pipes should not rest directly against timber or stone, which can cause noise. Experienced bathroom fitters in Bushbury pay close attention to these details to ensure a safe, durable, and professional installation.
Ventilation System Inspection
Run your bathroom extract fan and hold a light tissue near the grille. The tissue should be pulled towards the fan, confirming air is being extracted. If the tissue doesn’t move or barely moves, the ventilation isn’t working properly. Let the fan run for two minutes and check if moisture in the bathroom decreases.
Inspect the grille for dirt or debris that blocks airflow. Look for any visible ductwork to ensure it’s properly connected and not damaged. Noises from the fan should be minimal. A loud rattling or grinding sound indicates mechanical problems needing attention.
Wall and Surface Quality Checks
Examine paintwork for even coverage without drips, runs, or patchy areas. Sight along walls to look for smooth surfaces without bumps or dents. Check around fixtures where paintwork meets taps, towel rails, or other items. Paint should be carefully cut in without overlap onto adjacent surfaces.
For tiled walls, ensure finishes are neat around edges and corners as previously mentioned. Check that decorative trims, if included, are straight and secure. Inspect behind towel rails and other wall-mounted accessories using your flashlight to confirm wall finishes are complete.
Door and Accessibility Inspection
Open and close the bathroom door several times. It should operate smoothly without dragging or sticking. The door should close completely and latch securely. Check for gaps around the door frame that might allow water to escape during showering. Door hinges should be tight and not squeaky.
Verify that the door swing doesn’t block access to any fixtures. Ensure that the toilet paper holder, towel rail, and other accessories are positioned conveniently and securely fixed. Mirrors and shelves should be level and firmly mounted to the wall without any movement.
Lighting and Electrical Checks
Test all light switches and ensure they operate smoothly. Lights should illuminate immediately without flickering. Check that lights adequately illuminate the room, particularly above the mirror for grooming tasks. Run extractor fans while testing lights to confirm there’s no electrical interference or flickering.
If your bathroom includes heated towel rails or other electrical appliances, test their function. Everything should work without making unusual noises or generating heat at connections. If your bathroom includes sockets, ensure they have proper water splash protection covers.
Documentation and Communication of Defects
As you go through your checklist, photograph any defects you identify. Take photos of the full area and close-ups showing the specific problem. Note the location clearly. For example, “The top right corner of the shower screen sealant has a 5 mm gap” is more useful than “Problem with shower sealant.”
Create a written list of defects using clear, specific descriptions. Prioritise defects into three categories: those affecting safety, those affecting functionality, and those affecting aesthetics. Safety issues like loose electrical items need immediate attention. Functionality problems like poor water pressure need correction. Cosmetic defects like minor scratches can often be addressed as a final task.
Working with Your Bathroom Fitter on Snagging Issues
Present your snagging list to your fitter professionally and positively. Most reputable bathroom fitters expect and welcome snagging as part of the process. Discuss each item calmly and agree on timescales for correction. Many fitters will make minor cosmetic corrections immediately. More significant work might need scheduling within a few days.
Confirm in writing any defects found and agreed-upon remediation. This creates a record should disputes arise later. Ask your fitter to confirm when corrections are complete, and arrange to re-inspect those areas. Don’t settle the final payment until you’re satisfied all snagging items are properly resolved.
Timeline for Completing Bathroom Snagging
Ideally, conduct your initial snagging inspection within 24 hours of completion. This timing allows your fitter to still have their team and equipment mobilized on site. A thorough inspection typically takes one to two hours for a standard bathroom. Allow additional time if your fitter makes corrections on the day.
If defects are identified, allow your fitter between three and seven days to complete corrections depending on the nature of work. Once corrections are made, schedule a final re-inspection to confirm everything meets your satisfaction before settling final payment.
Protecting Your Warranty Through Proper Snagging
Most bathroom fitting warranties become invalid if defects aren’t reported within a specific timeframe after completion. Proper snagging documentation ensures you meet these requirements and preserve your warranty coverage. By identifying defects while your fitter remains responsible, you guarantee free corrections rather than paying for repairs later.
A thorough snagging process demonstrates your commitment to quality, which often encourages your fitter to take extra care, ensuring corrections are done properly. This collaborative approach typically results in a superior final outcome compared to disputes arising later when the warranty has expired.